Live Archives | Dictate-IT

Spell Word

While Live has very good recognition for UK medical speech, it can still make mistakes, particularly with names and especially homonyms names like: Mere, Mier, Meer, etc.


For persistent, frequently used words & phrases that misrecognise please:

  • Contact support@dictate.it, or
  • Use the ‘vocab editor’ (see section 10)


However, for one-off misrecognition such as uncommon family names, you can use the ‘spell word’ voice commands.


For an all lowercase word, use “spell word” then say each letter individually e.g.


“they fell off a spell word g a m b o” → ‘they fell off a gambo’


For a word starting with a capital letter use “spell word capital” (can also say ‘…capitals’) e.g.


“Patient surname spell word capitals f o n e” → ‘patient surname Fone’

Patient Translations

In some cases you may want to incorporate patient-friendly terms into your notes or letters. For example, when writing a letter to a healthcare professional, but copying in the patient. 


We have setup 340 ‘translations’ of common medical terms, for example: 


Medical term  Patient-friendly term 
Cirrhosis  scarring of the liver 
Contusion  bruise 
Arthroscopy  Joint camera exam 
Benign  not cancerous 


Settings Lock to Medisec ‘orange window’ v2.3.0

Medisec users you can optionally ‘lock’ the text focus to the Medisec orange window. This allows you to browse other systems while still dictating into the orange window via Live.


IMPORTANT – if you turn this setting on you will not be able to use formatting such as bold, underline or italics in the Medisec orange window.

This feature does not enable ‘locking’ to other application windows.

Vocab Editor

While the recognition for UK medical text should be very good, there can be issues with recognising names, or formatting some terms. The vocab editor allows you to create rules to transform specific text into other text.

The vocab editor is not intended as a fix-all for any misrecognition, but can quickly address simple, persistent issues if there is stable misrecognition. If the vocab editor hasn’t helped, please contact us at support@dictate.it.


To use the vocab editor, follow these steps:


Open the editor via the settings panel


To create a new rule click ‘New’


First, add the correct result, i.e. what text you want to end up with. This can be a single word or a phrase. Using a common phrase containing the word you want to correct is a way to make the rule more specific.


Then add your current known misrecognitions for the word/phrase you want, using the ‘Add’ action.


Both the ‘correct’ and ‘incorrect’ texts are case sensitive, so you can use the editor to correct casing as well.


In the below example, when the user says “cardiff and vale” they are currently getting ‘Cardiff and whale’ or ‘Cardiff and wail’. This new rule will transform either of those to ‘Cardiff and Vale’.


Click ‘create new rule’ to save the rule.


We can also add vocab edits on a departmental or organisational basis which may help dealing with local homonym people and place names (e.g. Meer / Mere / Meir) to do this please email support@dictate.it.


Getting Started

To use Live, the desktop application must be installed on your desktop PC. If wishing to record using a mobile device, the Live app must also be installed.


1. Install the Windows desktop application from https://dictateitlive.dictate.co.uk/ (Edge or Chrome recommended). Download the exe file, run the desktop application and login using your username and password. If you have not received your username and password please email support@dictate.it alternatively contact our Operations Coordinator or your PM while trialling the product.


2. Double-click on the Dictate IT Live ASR desktop icon to launch the application, then log in. Tick the ‘Remember me’ box if you want your password to be saved (not recommended for shared computers).


3. The first time you are logging into Live, you will be asked to select your recording device. We recommend using a headset, wired microphone or the mobile app. Laptop microphones are often low quality and can pick up background noise, which can impact recognition.
Select recording voice


Top tip! The recording device can be edited whilst using the application. To do this, hover over the desktop button and click the cog/settings icon.


4. Place your cursor where you want the transcribed dictation to appear. The cursor can be placed within any application that allows data entry, including your clinical system.


Top tip! You can also dictate into the Live ‘floating box’ to allow your text to be inserted multiple times into other applications. Find out how to do this here.


5. Option 1: record via the desktop application.
A button will show on screen. If the button is red, this means the application is ready to record. Open the application or document where you want to dictate and press the button to start recording. The button will turn green to indicate that it is recording.


Option 2: record via a mobile device.
Log into the Live app on your desktop and change the recording device to ‘Mobile Device’ under Settings. The Live icon will now display the text ‘Mobile record’. Open the mobile application, select where you want to dictate and press the red button. The button will turn green to indicate that it is recording.


To dictate via your mobile phone, please click here for the guide.


6. Click the icon again to stop recording. Your dictation will have been transcribed where the cursor was placed or into the floating box, depending on the option.


Top tip! Use the ‘grab’ handle on the left to move the button around your screen.

Settings Panel

To access the Settings Panel mouse-over the area next to the recording button:


Once opened, you will see the below window:


Recording device: Select the recording device you wish to use for dictating; such as mobile phone, headset etc.


Microphone mode: Applies only to external microphones such as Phillips SpeechMike and Olympus RecMic. Toggle to talk – start and stop recording with a press on the Rec button. Push to talk – press and hold the Rec button while recording and release the button to stop recording.


Text mode: By default, the service runs using ‘Type to cursor’ mode where text is streamed directly to your desktop cursor. Alternatively you may prefer to use the ‘Type to window’ mode where text is instead streamed to a Dictate.IT Live text floating window. Please refer to the guide here.


Voice Commands & Editing

Punctuation

Voice commands for common punctuation and formatting:

  • Full stop
  • Comma
  • New line
  • New paragraph
  • ‘Colon’ must be dictated as “double-point” as ‘colon’ is a medical term
  • Semi colon
  • Question mark
  • Exclamation mark
  • Open bracket, close bracket
  • Open quote, close quote
  • Hyphen
  • Dot dot dot
  • Over = /
  • Next bullet


Numbered Lists

To dictate numbered lists, use the command ‘number one’ then ‘number two’ etc. for subsequent items.


For example, saying:


“Diagnoses number one hypertension number two glaucoma number three diabetes new paragraph thank you for referring this 47 year old gentleman.”


Will be displayed as:


Diagnoses:

  1. Hypertension
  2. Glaucoma
  3. Diabetes


“Thank you for referring this 47-year-old gentleman.”


You can also instead dictate subsequent items using the command ‘next number’ e.g. “diagnoses number one hypertension next number glaucoma next number diabetes.“


For MS Word users

If you have auto-numbering turned on you should use slightly different voice commands:


“diagnoses number one hypertension new line glaucoma new line diabetes new paragraph thankyou for referring this 47 year old gentleman.”


Goes to:

Diagnoses

  1.   Hypertension
  2.   Glaucoma
  3.   Diabetes


“Thank you for referring this 47 year old gentleman.”


Text Navigation

Action Voice command
  • Jump to next [ ] – aka ‘blank field’
Next item
  • Jump to previous [ ] – aka ‘blank field’
Previous item
  • Jump to start of line
Start of line
  • Jump to end of line
End of line
  • Jump to end of text
End of text
  • Select line (if at start of line – shift+down arrow)
Select line


UI Navigation

Action Voice command
  • Click a UI button
Click button, press button
  • Check / uncheck a checkbox
Click box, click checkbox
  • Open a dropdown
Click list, Click drop down
  • Press spacebar
Press space
  • Press enter
Press enter
  • Press tab (moves between fields / form elements)
Next field, press tab
  • Press shift+tab (moves back a field / form element)
Previous field

Editing

Deleting

To delete the last recognised word say “delete that” or “scratch that”.


Select & replace

To select a word and replace it with another word

  1. Say “select text”
  2. Say the text you want to select e.g. “gentleman”
  3. (If multiple matches are found say which one you want e.g. “number two”)
  4. Say the word you want to replace it with e.g. “lady”


E.g. “select text gentleman lady”


Screenshots demonstrating how select and replace works


Capitalisation

You can capitalise a single letter using “capital”.


For example:

“capital b one sample is five by five centimeters”

Is returned as:

‘B1 sample is 5 x 5 cm’


Pathologists – to enable block keys A1 to A100 please contact support@dictate.it


You can force a word to ALL CAPS using “in capital”.


For example:

“thank you for referring this in capital gentleman today”

is returned as:

‘Thank you for referring this GENTLEMAN today’


Formatting

Action Voice command
  • Toggles bold mode on/off (only in Word)
In bold
  • Bolds selected text
Bold that
  • Toggles underline mode on/off (only in Word)
Underline
  • Underlines selected text
Underline that
  • Toggles italics mode on/off (only in Word)
In italics
  • Italicises selected text
In italics


Software Updates

Here at Dictate.IT, we are continually working to improve and develop our software. You will be notified of any software updates via email and our user forums – simply update the software when prompted to benefit from improvements and developments at no additional cost. If additional training is required for new functions we have a range of resources and training events available, please email support@dictate.it for more information.

Dictation Troubleshooting

Ensure you are dictating clearly


Click here to view tips and tricks for speech recognition.


Check the microphone is plugged in


If it is, and you are still experiencing issues with your microphone, test it with another application. If the issue persists please get in touch with us at support@dictate.it or your PM/Operations Coordinator during the trial period.


Check the correct recording device is selected


We recommend using a headset, wired microphone or the mobile app. Laptop micro-phones are often low quality and can pick up background noise, which can impact recognition.


Check the microphone is not muted


Your microphone may be muted in Windows, or via a laptop key, etc. You can go to your Settings or Control Panel to see if your recording device is muted.


Check the internet connection


Check that you are connected to the internet. If dictating via WiFi or 4G/5G, ensure there are no weak spots within the area in which you are dictating.


Correcting misrecognised words


As Live does not only recognise words individually, and instead also recognises patterns of words to form sentences, it will correct itself as you dictate.


Instead of pausing your dictation to correct a word, we recommend that you continue to dictate to complete the sentence.  Live may correct itself whilst you continue dictating the remainder of the sentence.


To avoid confusion, we recommend that you do not watch the screen whilst you dictate.  Instead, review the text when you have finished your dictation.  If any words are misrecognised, you can quickly amend any words at this stage.


Ask for help


If the poor recognition still occurs despite following the above guidance, please contact us and provide examples.  Please advise the date and time at which the misrecognition occurred, so our technical team can investigate.

Mobile App Dictation

To get started with Live, please click here for the guide.


We recommend using the mobile app for dictation, as laptop micro-phones are often low quality and can pick up background noise which can impact recognition.


The app can be downloaded for free on any mobile device – search ‘Dictate IT Live’ in your application store.

Download the iOS app (Apple App Store)


Download the Android App (Play Store)


1. To start dictating using your mobile device, login to the desktop app and then login to the mobile app using your Dictate.IT Live details. On iOS you can optionally enable touch ID or face ID for faster logon. Fingerprint login is coming to the Android app soon.


2. Run the desktop application and change the recording device in the Settings menu to mobile device and open the application on the mobile device as well.  You will need to be connected to either WiFi or mobile data on your mobile device.


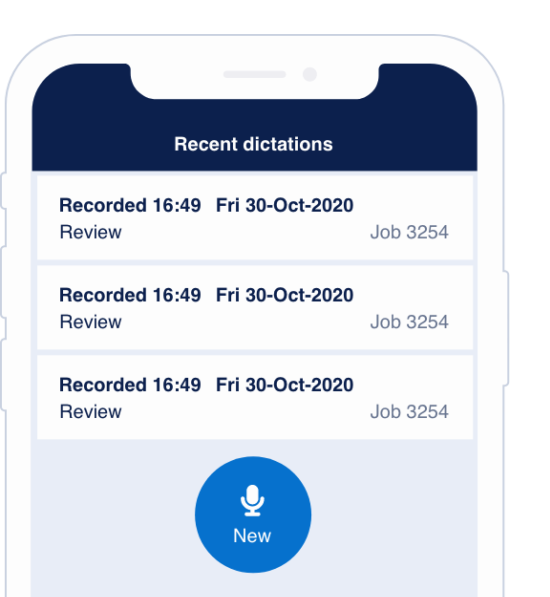
When dictating using the mobile app, the ‘red floating button’ will change to a grey colour and display the text ‘Mobile record’.


3. To begin dictating, click the field you want to dictate into and press the red ‘record’ button in the iOS/Android app. The app will then show ‘Recording…’


4. Start dictating into your mobile device. Use realistic UK medical speech. You can pause dictating at any time by pressing the ‘stop’ button in the iOS/Android app


5. When you want to start again, press the red ‘record’ button, your text will resume being added into the desktop/laptop app window.


You can hold the mobile device in front of you or put it down on a table, though we recommend being within 1m (or closer) of your phone for best recognition. A volume indicator will show if speech is being picked up by the app.


Your speech should be immediately recognised as text and displayed in the desktop/laptop app.


If the mobile app ever disconnects from the desktop, you will need to press the ‘reconnect’ button.


Since the app allows you to insert text onto your desktop/laptop even when your mobile device is not in the same room, we strongly suggest that you secure your mobile device using a passcode or TouchID/FaceID (iOS only) as additional security on top of the app’s password.


No speech or text data is stored on your mobile device.